A ceramic collection that captures the sea
Read More
Surface Studio work with leading interior designers across Australia sharing expert tiling advice, information and related services. Contact us today regarding your next project.
A perfectly specified tile can still disappoint on site — and grout haze is one of the most common reasons why. It's a finish issue, not a material defect, and it's almost entirely preventable. Understanding what causes it, how to avoid it, and how to address it when it does occur is essential knowledge for anyone specifying tiles at a high level.

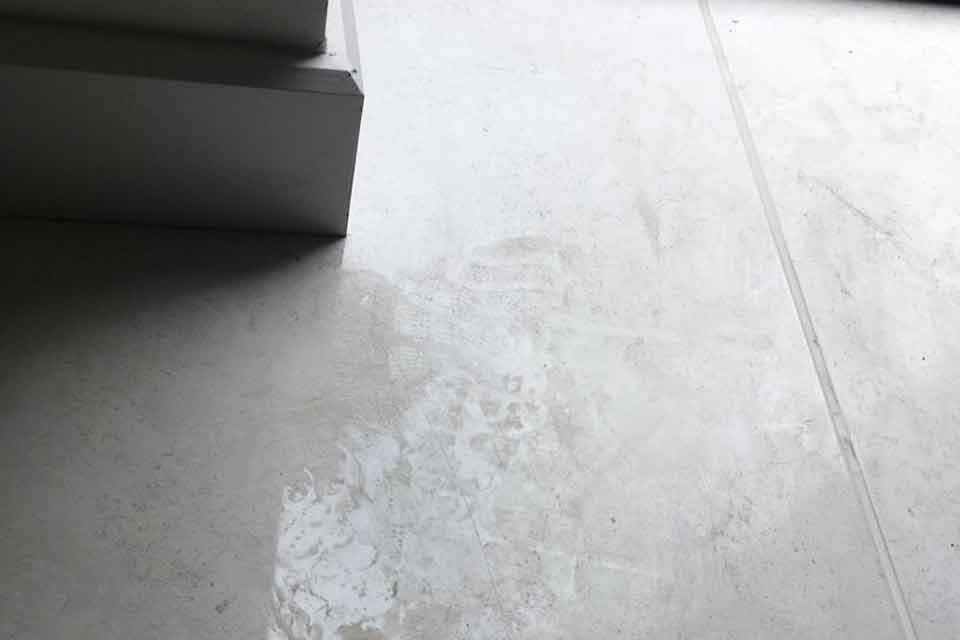
Grout haze is a thin, residual film of cementitious or epoxy material left on the face of a tile after grouting. It can appear immediately after installation, or it may only become apparent days or weeks later — once foot traffic, dust, and site contamination begin to accumulate on what is essentially an invisible layer of dried residue.
The result is a surface that looks dull, difficult to clean, or prone to marking — triggering the common assumption that the tile itself is defective, that it should have been sealed, or that it's simply a poor performer.
In the vast majority of cases, none of these conclusions are correct. The tile is performing exactly as intended. The haze is the issue.
Grout haze occurs when grout residue is not fully removed from the tile face during or immediately after installation. This can be caused by a range of factors, all of which are within the control of a competent installer:
Specification Note: AS/NZS 3958.1:2007 (Ceramic tiles — Guide to the installation of ceramic tiles) and ATFA (Australian Tile & Facade Association) guidelines both emphasise the importance of following manufacturer-specified working times and cleaning procedures. These aren't suggestions — they're the basis for any warranty or workmanship claim.
Best Practice: Prevention Over Cure
Preventing grout haze is always preferable to treating it. The following practices are widely recommended by leading manufacturers, ATFA, and the Tile Council of North America (TCNA) — whose Handbook for Ceramic, Glass and Stone Tile Installation remains a key reference globally.
Work in Manageable Sections
Limit grouting to 2–3 m² at a time, then clean before moving on. In warm or dry conditions — particularly relevant on Australian construction sites — reduce this area further. Ambient temperature and humidity directly affect working time.
Use the Two-Bucket Method
This simple approach is one of the most effective ways to avoid recontaminating the tile surface:
Change both buckets' water regularly. Grout residue accumulates quickly, and continuing to clean with dirty water is counterproductive.
Control Moisture
Use a damp sponge, not a saturated one. Excess water risks washing out joint colour, weakening the grout mix at the surface, and contributing to additional residue formation.
Follow Manufacturer Instructions Precisely
Mix ratios, pot life, cleaning windows, and curing times vary between products and brands. Deviating from these specifications is a primary cause of post-installation problems, including haze, pin-holing, and joint cracking.
For epoxy grouts in particular, the cleaning window can be as short as 20–30 minutes before residue begins to harden. Where epoxy is specified — common in commercial kitchens, wet areas, and high-hygiene environments — this is a non-negotiable factor in your installation brief.
Final Polish
After the initial sponge clean, a dry microfibre or cheesecloth buff can remove the thin haze film that often remains. This step is particularly effective on polished and honed porcelain.
How to Remove Grout Haze If It's Already Present
If grout haze has been identified after installation, it can still be addressed — but the approach must be matched to the grout type. Using the wrong product risks damaging the tile surface or grout joint.
Step 1: Start Mild
Begin with a pH-neutral tile cleaner and warm water. Light haze on recently installed tiles may respond to this alone. Work in small sections, rinse thoroughly, and assess before escalating.
Step 2: Match the Cleaner to the Grout Type
Cementitious grout haze responds to mild acid-based cleaners specifically formulated for tile. Products such as Aquamix Cement Grout Haze Remover are designed to break down alkaline residue without damaging the tile or grout joint.
Epoxy grout haze requires a dedicated epoxy residue remover designed to dissolve resin-based film. Standard cleaners will not be effective. Aquamix Non-Cement Grout Haze Remover is one widely used option in the Australian market.
Important: Always test any cleaning product in an inconspicuous area before proceeding. This is especially critical on natural stone, honed finishes, and textured surfaces.
Step 3: Technique Matters
If standard remediation products are not achieving results — particularly with aged or epoxy haze — a specialist tile restoration contractor may be required.
"The tiles should have been sealed."
Fully vitrified porcelain tiles (>0.5% water absorption, as defined by AS ISO 13006) do not require sealing. Grout haze is a surface contamination issue, not a porosity issue. Applying a sealer over an unresolved haze layer will trap the residue and make removal significantly more difficult.
"The tiles are staining."
What appears to be staining is often the haze layer trapping dirt. Once the haze is correctly removed, the tile should perform exactly as specified.
"The tile has a manufacturing defect."
Grout haze has no bearing on the tile's compliance with AS ISO 13006 performance criteria. It is an installation and maintenance issue, and cannot be attributed to the product.
A Note for Designers and Specifiers
Grout haze is a site issue — but it's also a specification opportunity. For premium residential, commercial, and hospitality projects, clarity upfront can prevent costly disputes and delays at practical completion.
Consider documenting the following in your project specification or installation brief:
These details shift grout haze from a reactive dispute into a proactively managed process — which is exactly where it belongs.
Grout haze is one of the tile industry's most persistent finish problems — but it is almost entirely avoidable with the right installation process and product knowledge.
A refined tile finish is the result of process, not just product.
The material you specify is only as good as its installation. At Surface Studio, we work closely with our clients across the full project lifecycle — from initial specification through to installation guidance and technical support — to ensure the outcome on site reflects the intent on the drawings.
If you have questions about specifying tiles, grout systems, or installation best practice for your next project, our team is here to help.
Useful References
Disclaimer: The information provided in this article is general in nature and is offered in good faith as a guide only. While every effort has been made to ensure accuracy at the time of publication, Surface Studio accepts no responsibility or liability for any loss, damage, or issues arising from its application. Installation methods, material performance, and site conditions vary — always refer to the relevant manufacturer's technical data sheets and conduct a test sample prior to proceeding.
The articles contained in this blog series are published by Surface Studio for general informational and educational purposes only. All content is provided in good faith as a guide to assist architects, interior designers, builders, and other building industry professionals in understanding tile and stone specification, installation, and performance considerations.
READ OUR Articles